Group Blog Home
Group Blog Home

Recent Posts
1  2  3  4  5  6  7 
Create It!

APL Staff member Dominga gives a step-by-step tutorial on how to make your own face mask!
This mask design follows a pattern from Kaiser Permanente. Detailed instructions can be found here: Fabric Face Mask Instructions 


Utilizing sewing machines from our Sewing Labs and practicing safe social distancing, APL and other city staff are making masks for hundreds of frontline workers in the city of Aurora, including the Aurora Police Department, as well as for people experiencing homelessness.

In order to broaden our reach, we are looking for donations of the following items:
• Fabric that adheres to CDC guidelines 
• Thread
• Completed masks

If you have items to donate, or would like more information about this project, please contact us at [email protected].
Posted by [email protected]  On Apr 30, 2020 at 9:37 AM
  
Create It!

Library Assistant Stacy demonstrates two methods for making watercolor art without using watercolors!

 Supplies:
- Thick paper (cardstock, sketch paper, etc.)
- Water
- Washable markers
- Sponges
- Q-tips


Stay tuned for part two!

Show us your watercolor creations in the comments!
Posted by [email protected]  On Apr 22, 2020 at 4:05 PM
  
Draw It!

Draw It! â€‹by Kristin

Grab a pencil and piece of paper - it's time to Draw It! Our APL staff member Kristin shows step-by-step how to draw an adorable sheep!


Let us know how your sheep turns out in the comments below and tell us which drawing tutorial you'd like to see next! 
Posted by [email protected]  On Apr 01, 2020 at 10:23 AM
  
Create It!

Stomp Rockets
by Adam


Supplies Needed
· 2 liter or similar-sized plastic bottle
· Bike tire inner tube (demo one is 26 inches but most sizes will work)
· Small piece of 1 inch PVC pipe (Size can vary)
· Duct Tape
· Scotch Tape (Masking and electrical will work as substitutes)
· Scissors
· Paper
· Markers/Crayons/Colored Pencils

Launcher
1. Take out the inner tube and cut it with the scissors just above the valve. Do not cut off the valve.
2. Pull one end of the tube over the mouth of the bottle and use the duct tape to anchor it in place.
3. Pull the other end of the tube over one side of the PVC pipe and duct tape in place

Rocket
1. Personalize a sheet a paper by drawing a picture, writing your name etc. Roll the paper around the pipe, making sure that it is snug but not tight. Tape the seam.
2. Slide the paper up and down the pipe to make sure that it moves freely and adjust tightness as needed.
3. Make a cone by cutting out a baseball diamond from a different sheet of paper and joining the straight edges with tape. Use additional tape to seal the cone as airtight as possible.
4. Place the cone over the rocket body. It will overhang so taping will be easier if you reinsert the pipe to give yourself a solid surface to tape on to.
5. Tape down the edges of the cone.
6. Create fins by cutting out triangles and then taping them to the body of the rocket.

Launch
1. Place your rocket on the pipe and aim it skyward away from people, animals and trees. Never launch directly into a tree, you will have a hard time getting your rocket back in one piece 😉
2. Stomp on the bottle to launch the rocket. 
3. Retrieve the rocket and re-inflate the bottle (either with a bike air pump or by blowing into the pipe – if you use this method, be sure to sanitize the pipe!)
4. Have fun!

Tips & Tricks
1. Fins help with stability and aerodynamic flight. Consider different numbers of fins and shapes of fins. Notice how each combination affects the flight of the rocket.
2. Change the launch angle of the pipe. Track how far each launch goes and see which angle is the best.
3. Do not underestimate the range of your rocket. It will go farther than you think.

Tell us how your rocket flew in the comments below! How far did it go? What type of fin worked best?

Posted by [email protected]  On Mar 27, 2020 at 8:56 AM
  

Baseball diamond title photo
Post by Zach S.

With opening day over and the warm days of spring setting in, it’s time to get ready for a season filled with all things baseball! Whether you’re a lifetime fan who can name batting averages from memory or simply enjoy the foot long hot dogs at a game, we can all enjoy these fun baseball crafts, recipes and movies together.

We’ll start things off with my personal favorite – a baseball piñata! While it is a little more involved, it will certainly be the hit of your party. This craft comes from Easy Crafts For Kids.

Materials:Baseball pinata
• Bowl
• Water
• Newspaper
• White Paint
• Red Marker
• Balloon
• Pin
• Glue
• Scissors
• Candy (wrapped)

Step 1:
Blow up a balloon. Make it about the size of a softball.
Cut out strips of newspaper. You want these strips to be about an inch width and a few inches long.
Mix your paper mache mixture - 3/4 glue 1/4 water.

Step 2:
Dip a piece of newspaper in the glue mixture, coating it completely. Take off the excess with your fingers.
Cover your balloon in moistened pieces of newspaper.
Make sure to leave a small area around the balloon end. This will allow you to pop the balloon and fill it with candy.

Step 3:
Once the balloon is covered, place it in the sink to dry.
Once it is partially dry add another layer of paper. This time use white paper so it is easier to paint the ball afterwards.
This can take up to 24 hours depending on your region and temperatures.

Step 4:
Once dry fill it with candy and cover the hole up with some white paper (covered in your glue mixture). Allow to dry.
Paint the balloon white. Allow to dry.

Step 5:
Draw on stitching with a red marker. This will be one large oval around the baseball - adding V marks around it.

************************************

I think it’s time for a snack to refuel after that project. How about baseball rice-krispie treats? This recipe comes to us from Domestically Speaking.

Rice krispie baseballs
1. Make a batch of classic rice krispie treats but instead of putting them in a pan, put them in a cookie sheet with sides. This will make the rice krispie treats thinner for cutting. 

2. Let them set up for about 30 minutes before using a round cookie cutter.

3. Melt some white chocolate in a glass pie pan.

4. Dip one side into the white chocolate.

5. Use a spoon to add some more white chocolate to the dipped tops and then smooth them with an off-set spatula.

6. Once they set up (about 30 minutes) use a red gel cake decorating tube to make the baseball stitching.
 
************************************
 
Now that we’re refueled and full of sugar, let’s get one more craft in before we’re done. Fingerprint baseballs! This craft comes from Crafty Morning and is a great one for the younger kids.
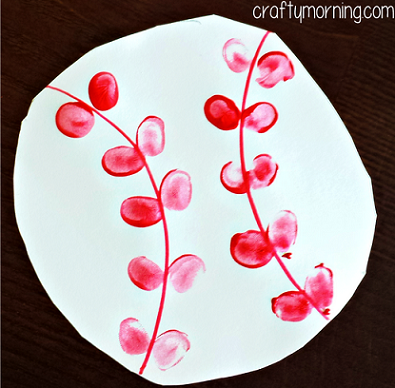
Fingerprint baseball
Materials:

Fingerprint baseball• White paper
• Red washable paint
• Scissors
• Red Marker

1. Start by drawing a circle onto a piece of paper and having the kids cut it out.

2. Take a red marker and draw two curved lines.

3. Have the kids dip their pointer finger in the red washable paint and make laces on the baseball. Let it dry and you’re done!


************************************
Top your busy day off with a baseball movie night! Check out this list of baseball themed movies from 3 Boys and a Dog. Stop into your Aurora Public Library to check out some of the movies below on DVD.


 "The Perfect Game"
DVD @ APL
 DVD cover  "Million Dollar Arm"   DVD cover
 "The Sandlot"
DVD @ APL
 DVD cover "A Mile in His Shoes"
 DVD cover
 "Rookie of the Year"
DVD @ APL
 DVD cover "Season of Miracles"
DVD @ APL
 DVD cover
"The Final Season"  DVD cover "Angels in the Outfield"
DVD @ APL
 DVD cover
"Everyone's Hero"

 DVD cover


Hopefully these activities help you get your baseball season off to a great start! For any baseball books, movies, or other resources, stop into your Aurora Public Library branch and chat with us!

Posted by [email protected]  On Apr 11, 2018 at 8:42 AM
  

Paper snoflakes

Craft Time! Paper Snowflakes


Post by Justine C

With winter here and snow days waiting to happen, you might be wondering how you can keep kids occupied when it’s too cold for them to play outside. It certainly won’t do to put them in front of the TV or computer screen for hours on end. Fortunately, there are plenty of fun crafts you can do in the comfort of your own home with materials you most likely already own. All you need to make your own snowflakes is a white sheet of paper, a pair of scissors, some tape or glue, and yarn!

Materials:

  • A white sheet of paper cut into a square (try coffee filters if you don't have a piece of paper)
  • Scissors
  • Tape or glue
  • A ball of yarn or string

Instructions (see below for a visual of each step):

  1. Fold your sheet of paper in half diagonally until it’s in a triangle shape.
  2. Fold it in half again so the pointed ends meet and it makes an even smaller triangle.
  3. Now fold the triangle into thirds. You’ll want them to be even, so make sure to do your adjustments before creating the creases.
  4. Cut across the bottom of the paper to create a triangle.
  5. Cut patterns into the newly formed triangle. Be creative! Just don’t cut it clean across - you’ll need to be able to unfold it.
  6. Unfold the paper completely and carefully. Now you have a unique snowflake of your very own!
  7. Cut a piece of yarn at least a foot long.
  8. With tape or glue, attach the yarn to one of the edges of your snowflake.
  9. Hang up your snowflake from the ceiling, in the window or somewhere else that could use some winterizing!

Snowflake Craft Visual How-To

This fun and easy craft is suitable for any child who’s comfortable using scissors and is something every member of the family can get in on! Once you’ve tried the way described here, try and make specific designs such as hearts or moons, or search the internet for extreme patterns that you can follow. Try starting with this Google search! Don’t take my word for it - try it out and be sure to share your results on Instagram or Twitter @APLReadingRocks!

Happy crafting!

Posted by [email protected]  On Dec 06, 2017 at 11:30 AM
  
1  2  3  4  5  6  7